Git Basic commands in a nutshell
Without a doubt, git is the most popular Version Control System nowadays. There is a big chance that everyone who works with IT already heard about it, or even already used git. In this post, I gathered the most common git commands in one place and a brief explanation about them.
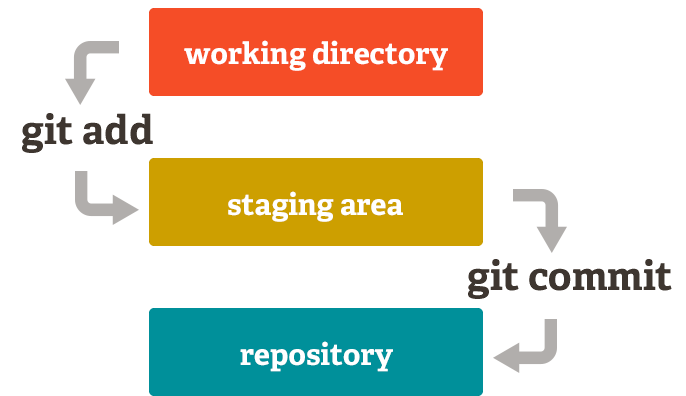 Commit workflow — Image from Git Docs
At the end of the post, I will let all commands used with the description of them.
Prerequisites
To demonstrate in a more realistic scenario, in this post we will use a dotnet core project and, of course, the git tool. Right below, you can see all the prerequisites to follow it, and after there are links for previous posts showing how to configure git and VS Code, as well as how to install dotnet core and create a project with it.
- git
- Visual Studio Code
- dotnet core
- Windows Terminal
Git and Visual Studio Code
Git and Visual Studio Code are the main tools that we will be using in this post, so if you do not have it already configured, in this post, I describe how to set it up.
Creating a dotnet core project
To demonstrate in a more realistic scenario, we will create a simple dotnet core project. In this post, I show how to configure dotnet core on your computer, and also how to create a web app project to be used as an example.
How to configure git locally
Initializing a git repository
Initializing the git repository is the first step to start working with git. It will create the git structure, and allow you to start versioning your files. It is possible to initialize either an empty directory or a directory with files inside already. In our case, we already created the project files previously following this post.
It is possible to initialize the git repository by either the user interface or the command line, which one is better, depending on your personal preferences. Below you can see both options:
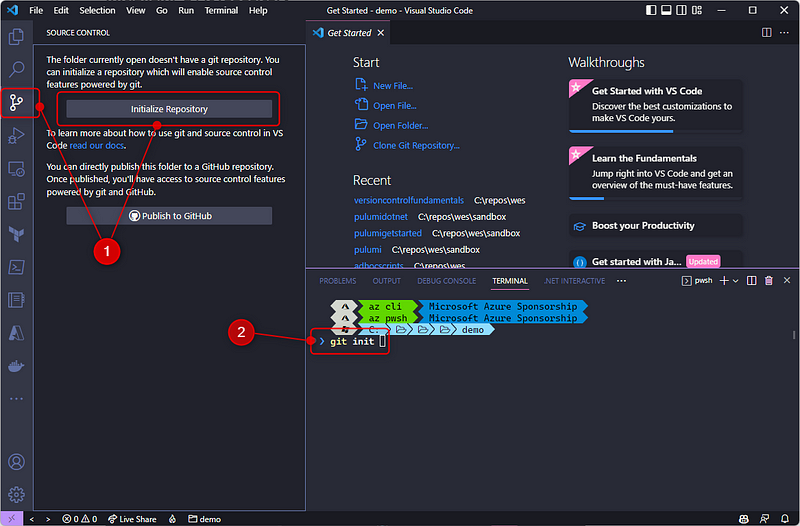
For the command line, simply type the command git init . And that’s it! Quite simple as I promised :).
What is the .git directory?
.git directory is a hidden directory that git creates to keep its files inside. You rarely need to change something in these files, but it’s worth knowing that git uses .git a directory to identify and control your repository. Due to the fact this is hidden, you need to run a special command to see it. With PowerShell, you can see with the command Get-ChildItem -Hidden
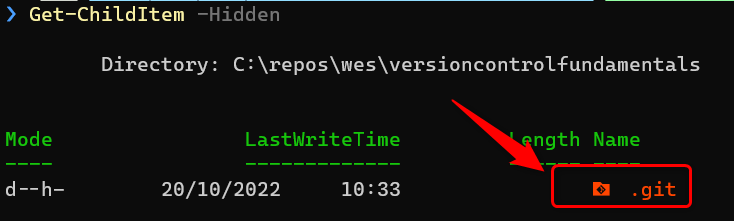 .git directory — Image prepared by Author
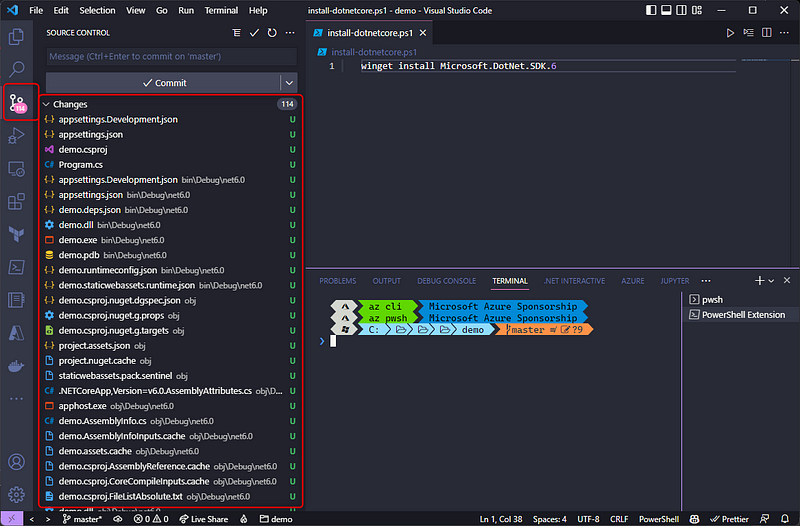
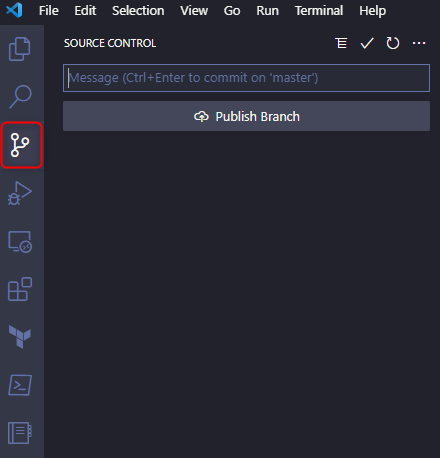
To verify how the files are being tracked by git, click on the git icon on the left menu. After that, it is possible to see all files under “Changes”
What are the basic git commands for local repositories
ignoring files
Before we go to the commands themselves, it is important to understand that in some cases, it is not desirable to keep certain files under source control. For example, when we work with compiled languages, it generates binary files that you don’t want to keep under version control, as they can always be generated using the code that is already versioned.
To solve this problem you need to create a .gitignore file, with instructions on which files you don’t want to keep versioned.
To create this file, as we are using a dotnet core application as an example, in the VS Code terminal, ensure that you are in the root directory of your repository and type dotnet new gitignore.
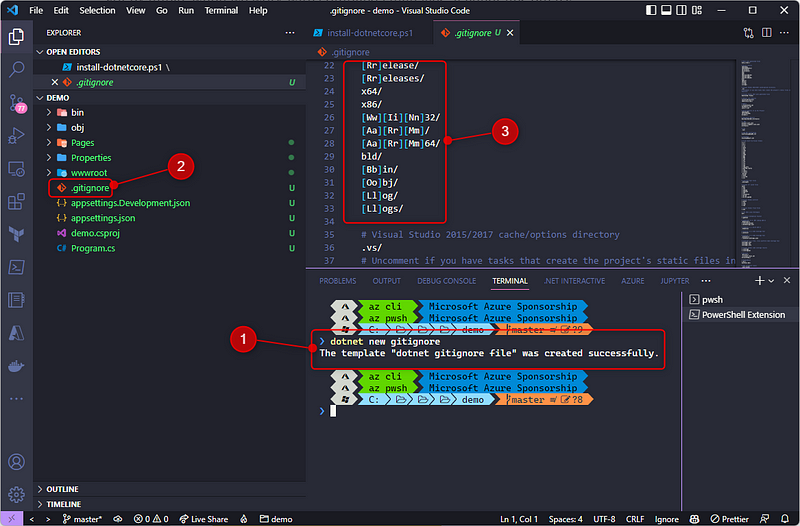
You can see that among others, the folders binand obj are listed, which is what we want in our case.
stage — Adding files to stage with git
Staging is an intermediate area where you keep your changed files before you finish the commit. It allows you to review and format them, and also makes it easy to commit your files partially.
Commit workflow — Image from Git Docs
The command git add is used to add the files to the staging area. You can add file by file specifying the name git add <your file name>, or you can add all files at once with git add .
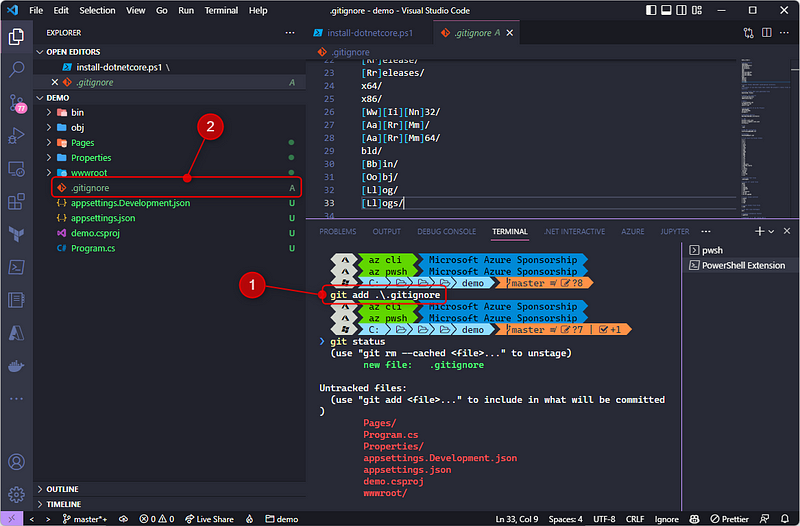
In our project, let’s first add the gitignore that we created in the session above. It will prevent adding any undesired files that are already generated.
For this type the command git add .\.gitignore. You will notice that on VS Code the letter in front of the file name changed from U(Untracked) to A(index Added) and also it slightly changed the color. It means that this file is under the staging area.
Now that the gitignore is already there, we can add the remaining files with git add . .
Recording your changes with git commit
Finally, we will be able to create our first commit! It will record our changes in the version control. It always requires a comment, to identify what had changed in this commit. To do so, use the command git commit -m "my first commit" . Notice that all files under the source control menu disappeared, but no worries, it means that there are no more files in the staging area, and they are already “safe”.
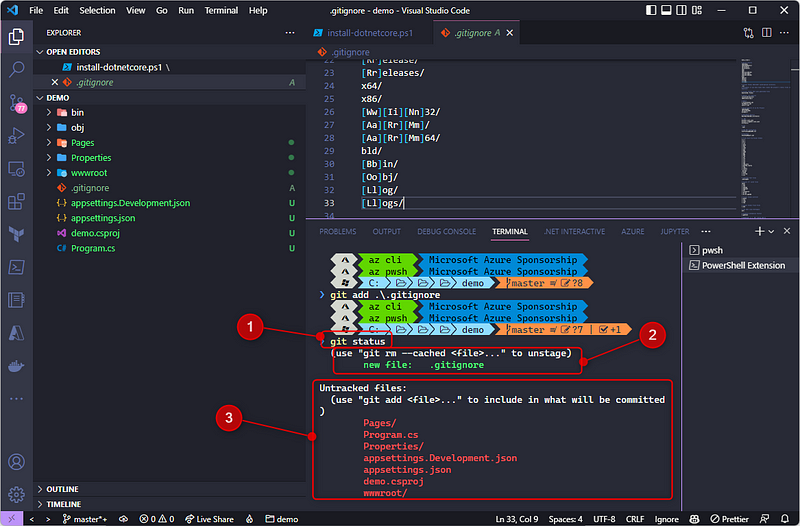
Finding the status of your changed files
Before, we checked the files in the staging area by the user interface. But it’s also possible to use the command git status for that. Notice that is possible to visualize either the Staged and Untracked files:
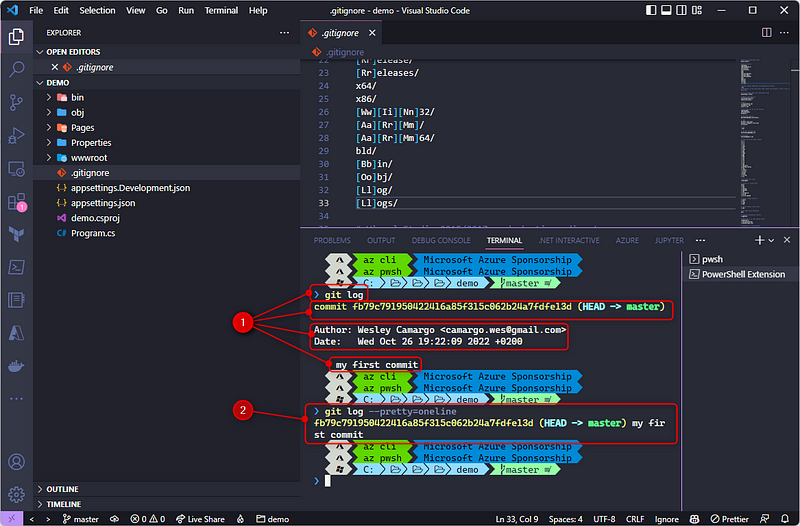
Using git log to show your history
The commandgit log is used to show the commits history, and brings useful information. By default, it shows the commit hash, which helps to track in which branches, or environments the changes are, the author and date of commits, which helps to identify who made those changes, and finally the comment of the commits that shows (if used correctly🙃) the purpose of that commit.
You can also customize the results, one of my favorites is to show all commits in one line, for this you can use git log — pretty=oneline.
If you followed the first post of the version control series to set up your git environment, I also included the configuration of an alias for a log command with some formats I like to use. You can also see all details of this in this post.
Creating and moving among git branches
There are several ways to work with git and organize your branches, which is called branch strategy. In the most common it is necessary to create branches to apart your code from the stable branch.
In the DevOps community, there are polemic discussions that branching is a bad practice that avoids real continuous integration, but this is not the topic that we are approaching today.
Independent if it is a good practice or not, branches are very useful for many situations and it’s worth having it in your toolbox.
When a repository is created, it always creates a default branch, which can be called master or main depending on your preferences, and both can be used as stable branches or baselines.
It is fairly common to create branches called **features**, so it is possible to work without interfering with the stable branch.
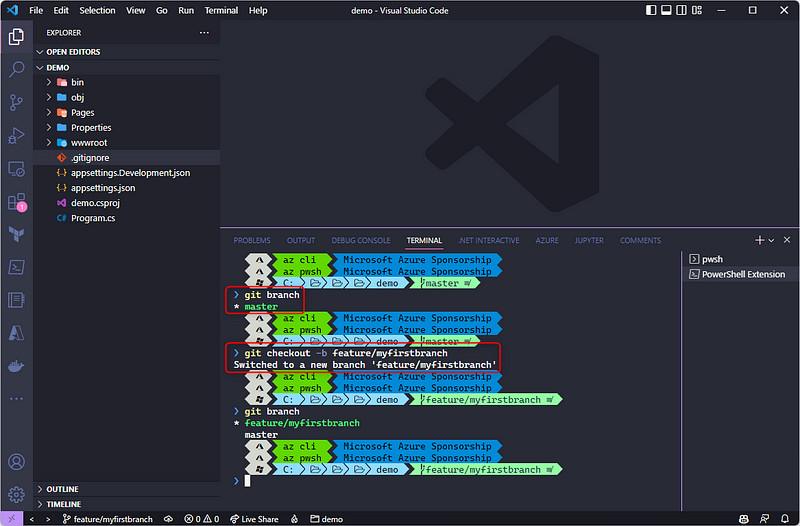
To list the branches on your repository, simply type git branch, and it will show all local branches that you have. If you have a remote repository you can also list the remote branches with the command git branch -r.
To create a new branch use the command git branch <branch name> or git checkout -b <branch name> . Personally, I prefer the second option, as it already switches to the newlywed-created branch.
Imagine that after some commits on your feature branch for some reason you want to move back to master, so the git checkout <branch name>command will be moving from one branch to another.
All basic git commands gathered
As promised, below are all commands used in this post:
Key take aways
Git is a foundation of mostly modern development, and starting with it is quite simple. I hope that with this commands list you will help you move forward with the IT world!
Related posts
How to create a dotnet core project with command line | by Wesley Camargo | Oct, 2022 | Medium
How to setup your environment with git and VS Code with choco | by Wesley Camargo | Oct, 2022

If you find this helpful, please click the clap 👏 button below a few times to show your support for the author 👇