Creating Infrastructure as Code for Azure with Azure Bicep step by step
 Photo by Arisa Chattasa on Unsplash
One of the natural steps towards DevOps and Cloud Adoption is to create your Infrastructure using Code. For Azure, the most convenient language for this is Azure Bicep which abstracts several aspects of this complex process, and supports more resources available in Azure than any other tool, making it one of the most powerful Infrastructure as Code tools for Azure.
What is Azure Bicep?
According to Microsoft Documentation, this is the definition of Bicep:
Bicep is a domain-specific language (DSL) that uses declarative syntax to deploy Azure resources. In a Bicep file, you define the infrastructure you want to deploy to Azure, and then use that file throughout the development lifecycle to repeatedly deploy your infrastructure.
In summary, this is an abstraction over ARM templates which simplifies A LOT the development of Infrastructure as Code. Its syntax is much simpler and less verbose than ARM but still has all its capabilities.
As bicep is a DSL, we can consider ARM as an Intermediate Language and we can “build” bicep into ARM to perform our deployments. A curiosity is that the name bicep is a play on words for ARM (Azure Resource Manager) 😄.

How to create an Azure Resource Group with Azure Bicep?
Usually, one of the firsts resources on Azure that we need to create is a Resource Group, as it will group all other resources, and make it easier to administrate.
Create an Azure Resource Group using Azure Bicep it is quite simple, you need just the name of the resource group and the location that it will be created. Additionally, it is necessary to define the *targeScope *as a subscription, it will be explained in more detail below.
It is possible to deploy it in different ways, using Azure PowerShell, Azure CLI, or even Azure API’s. In this example, we will use Azure CLI to execute the deployment.
How to execute an Azure Resource Group deployment with Azure Bicep and Azure CLI?
On the latest versions of Azure CLI, there are different commands to run deployments against different scopes on Azure. To create Azure Resource Groups, it is necessary to use the *subscription *scope, which was also defined on the bicep template above.
The command used is az deployment sub create :
After running the script, we can check the resource group with the command az group show --name rg-bicepdemo :
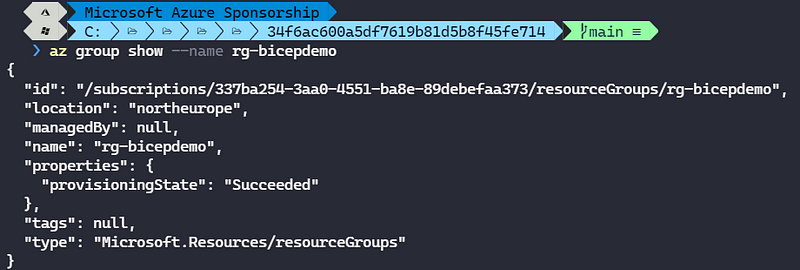 Image by author
How to create an Azure Storage Account with Azure Bicep and Azure CLI?
When we will create a “common” resource, like Storage Account, Resource Group scope must be used. This is the default behavior of bicep, so it is not necessary to specify like it was for Resource Group creation.
To create resources on Resource Group scope, the Azure CLI command used must be az deployment group create :
To check the Storage Account creation run the command az storage account show --name stbicepdemo
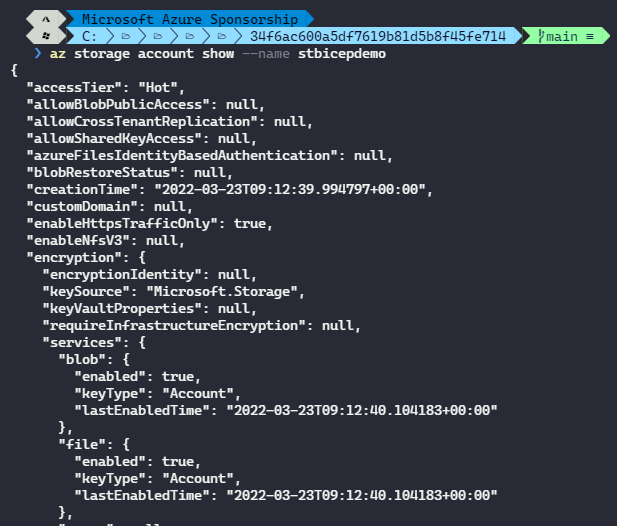 Image by author
As they are in different scopes, it is not possible to run both bicep files with one command, however, I prepared a PowerShell script to run them in sequence:
Conclusion
Azure Bicep is one of the most promising Infra as Code tools for Azure, and it is quite simple to create new templates for it. Its syntax is very simple and easy to learn, so why not give it a chance? :)
See you in the next post! [
 ](
](Join FAUN: Website** 💻|Podcast 🎙️|Twitter 🐦|Facebook 👥|Instagram 📷|Facebook Group 🗣️|Linkedin Group 💬|** Slack 📱|Cloud Native News** 📰|More.**
If this post was helpful, please click the clap 👏 button below a few times to show your support for the author 👇